Geiger Cardigan: Blocking Front to Dimensions
Here are a series of photos of me blocking one of the Fronts of the Geiger Cardigan.

Greetings! I’m a Knitting Instructor based in Raleigh, NC, with over 10 years experience teaching at local yarn stores and online.
Here are a series of photos of me blocking one of the Fronts of the Geiger Cardigan.


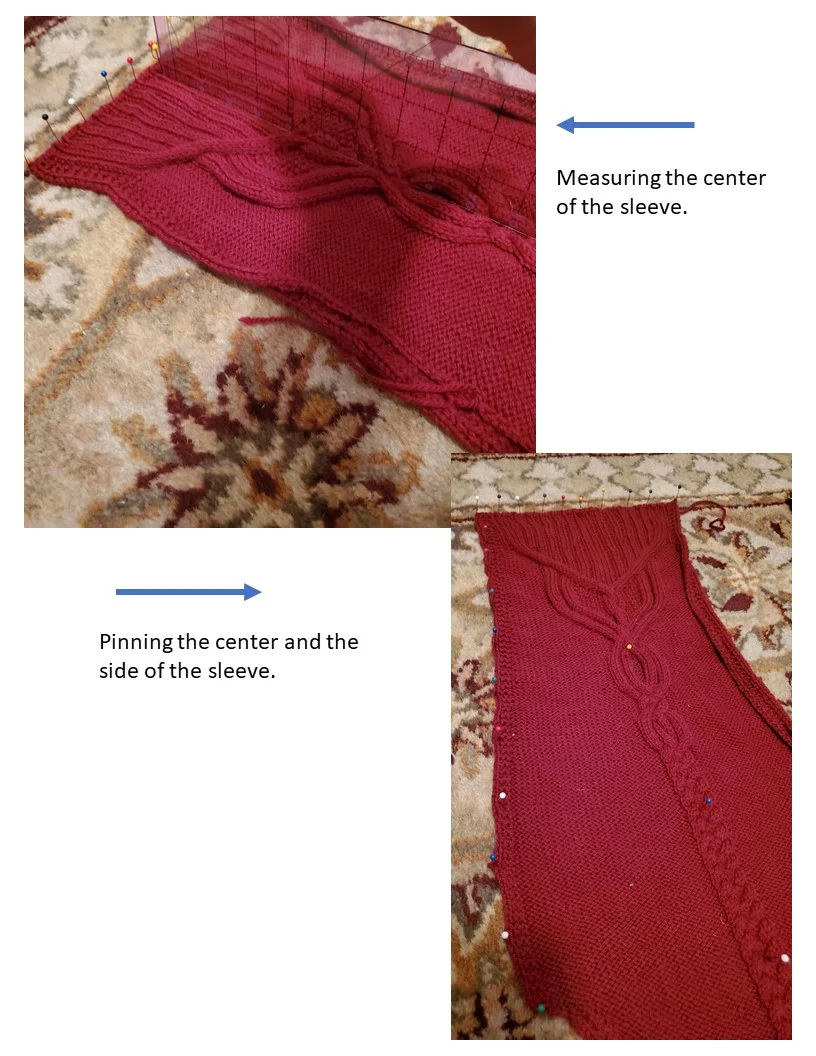
Here are a bunch of photos of me blocking a sleeve for the Brooklyn Tweed Geiger Cardigan.


This post will show A LOT of photos of me blocking the back of the Geiger Cardigan to the pattern dimensions. The process of blocking all the pieces is pretty much the same. Follow-on blog posts will show photo collages of blocking the fronts and the sleeves.

These are various pieces of my Geiger Cardigan soaking in cold water and Eucalan in the sink. Cover with water and let soak at least 1/2 an hour. I’ve been known to leave overnight with no ill effects.

Carefully lift your pieces out of the water using BOTH hands (my other hand was holding the camera). Gently squish out as much excess water as you can without wringing or aggressively treating your work.

Arrange the pieces on a fluffy, absorbent bath towel and roll it up.

Step on the towel all over to squeeze out as much moisture as possible. It’s a good idea to do this once more. Get a fresh towel, rearrange the pieces, roll up and step again.

I usually block directly on to the carpet in my knitting room. If you have blocking boards or a mattress or another convenient place you like to work, use that. Bring your pieces to your blocking location. Have stainless steel (not nickle-plated) pins on hand as well as one or two straight-edge rulers. You’ll need your pattern page with the sweater dimensions open and your size highlighted.
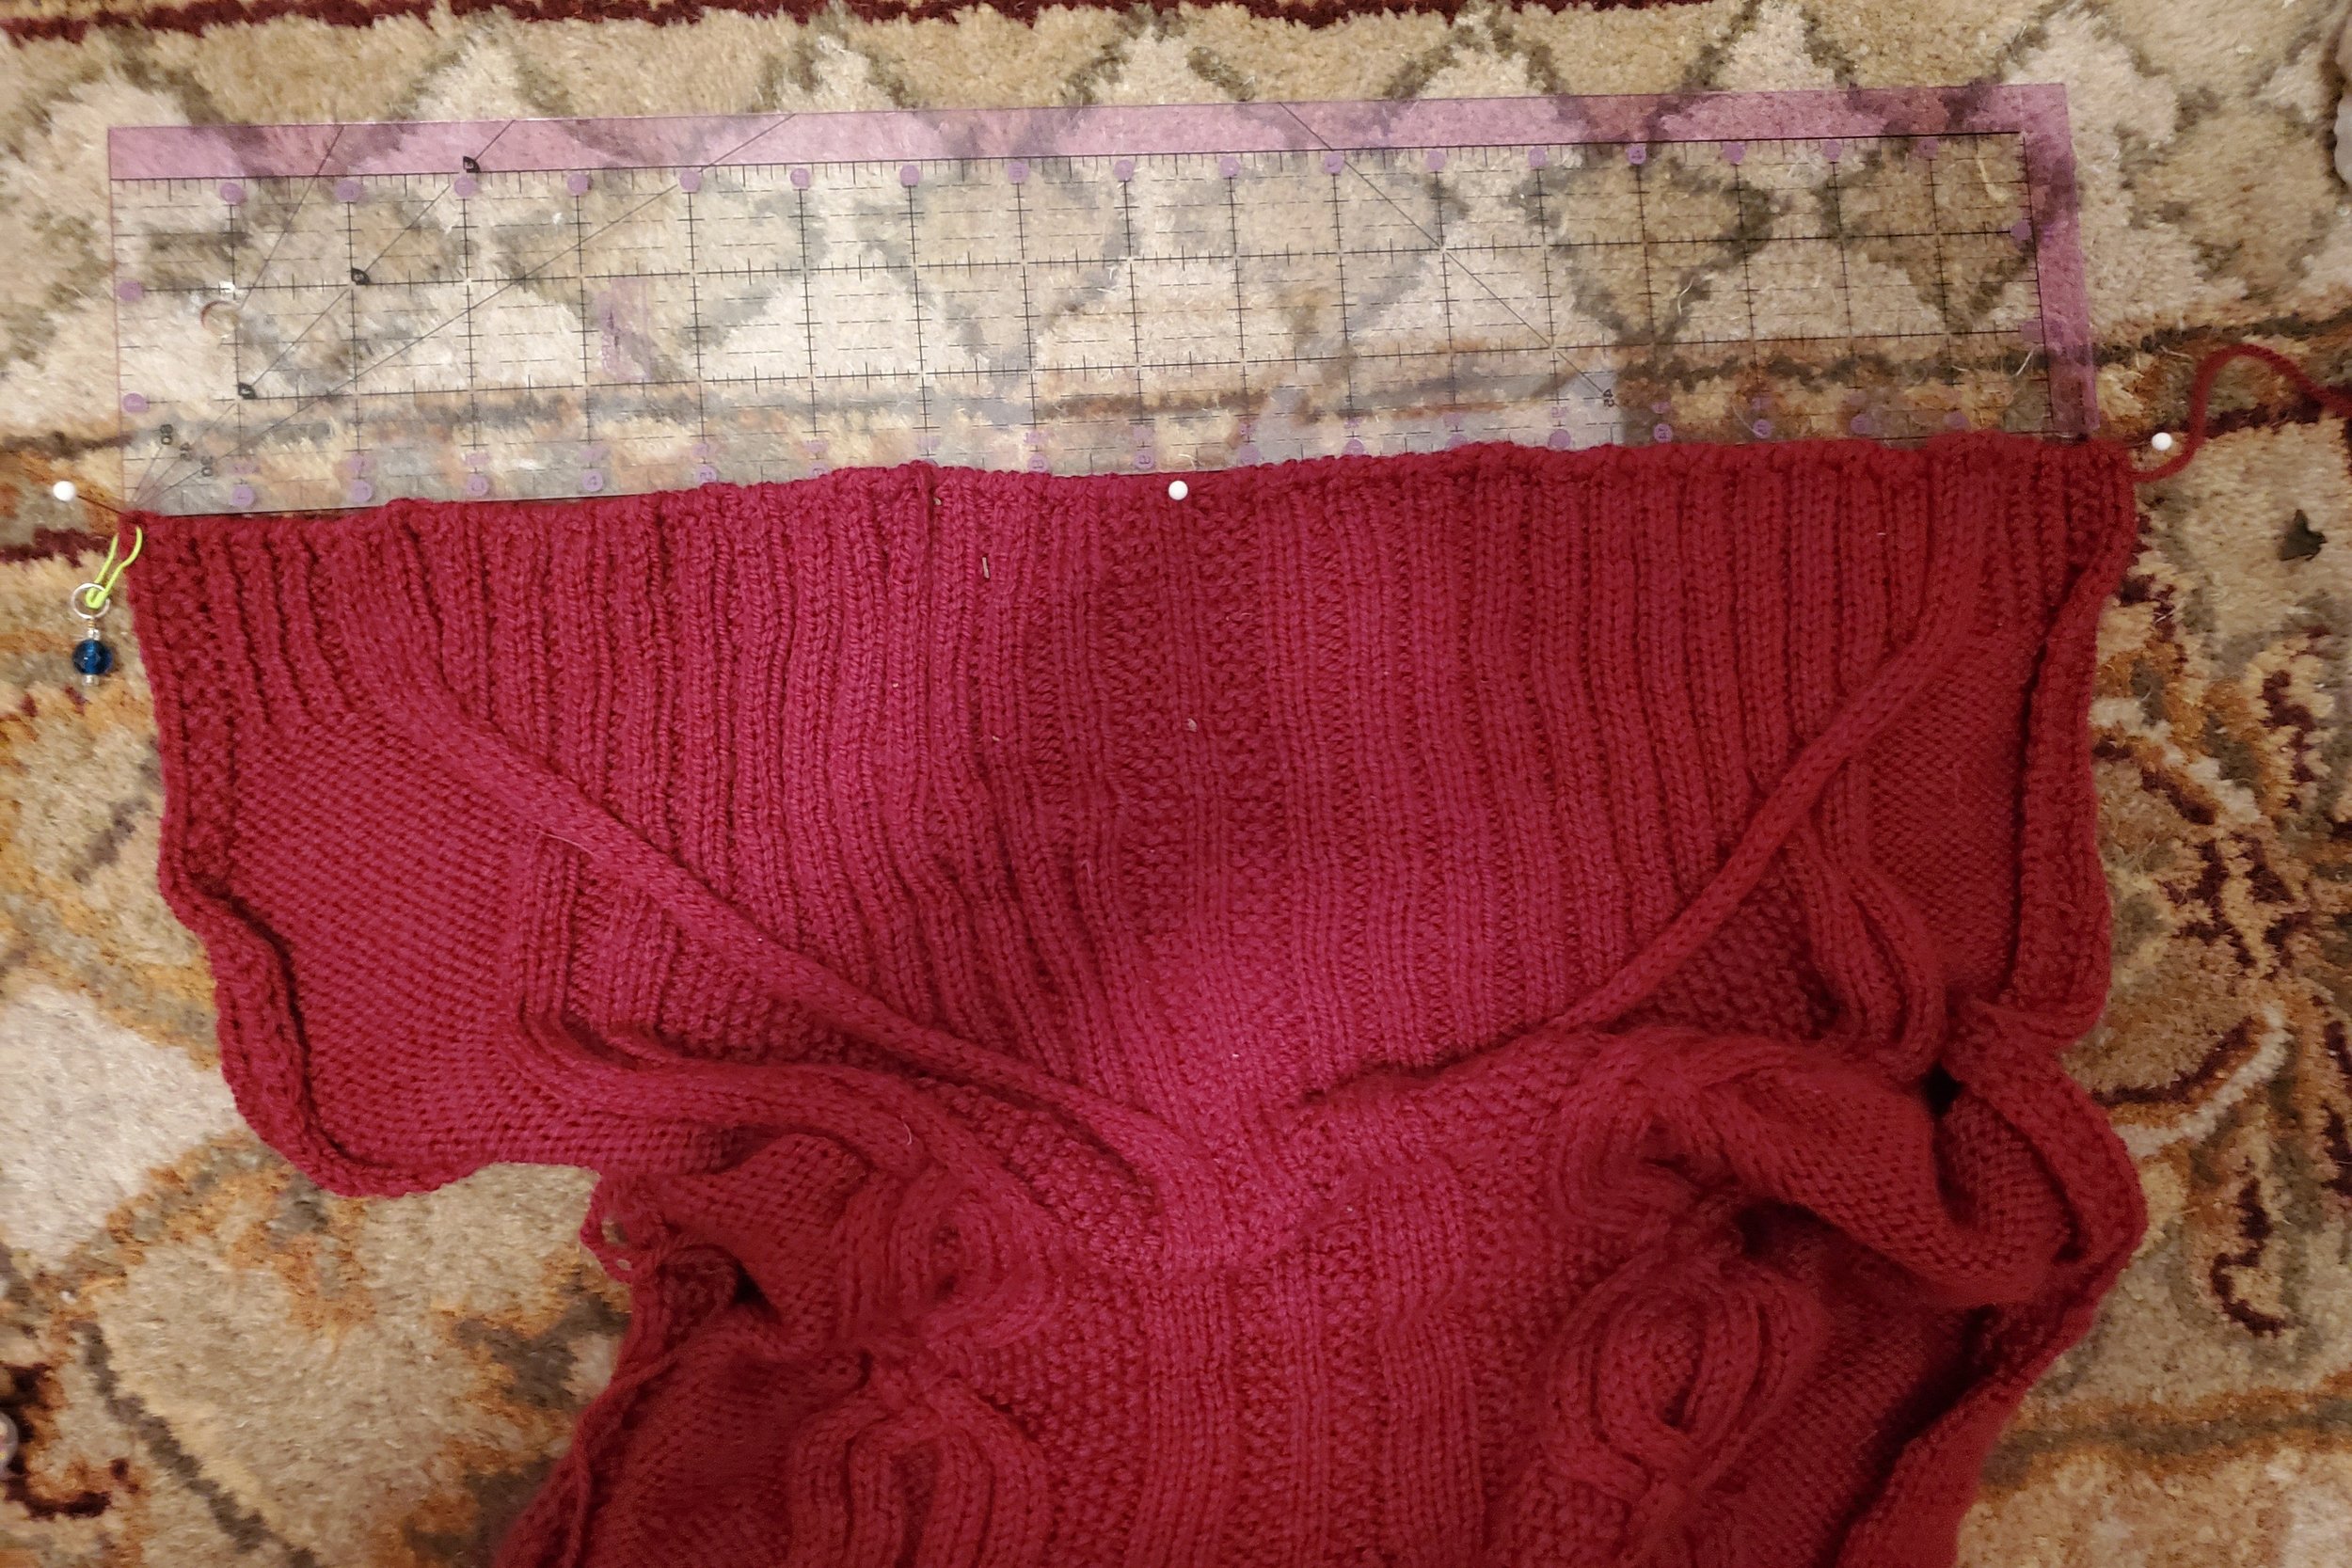
This is the back of the Geiger sweater. I choose a part of the sweater that’s a straight line and begin there. In this case, I start with the bottom of the sweater. I line it up to a straight line on my carpet (how convenient) as well as against my straight edge. I coax the width of the sweater to the correct dimensions. I pin the exact middle of the spine to half the bottom dimension and then evenly pin the sweater across this edge.
A word of note: I’m using the yarn the pattern called for, Brooklyn Tweed Arbor. It’s a fantastic yarn, but be warned that it stretches A LOT when wet. Coaxing into dimensions when blocking is very important.

This is how the bottom looks completely pinned. I spaced my pins about an inch apart.

Next I worked on the side edge. It’s not a straight line, so I started by measuring out the total dimension and placing a pin at the top and bottom edge at the proper length. I then did the same on the other edge.

Since I know that the bottom ribbing is a straight section, I next pinned the sides of the ribbing. I made sure that the bottom of the sweater and the parallel top of the ribbing were the same width.

The other straight line on the Geiger back is the center spine. I lined up my straight edge along the spine and pinned about every inch. I already determined where the middle of the sweater was when I pinned the bottom. So, I just measure perpendicularly up the spine and keep a straight line for the dimension noted in the pattern, coaxing where necessary.

This is the center spine pinned to dimensions.

This is a good time to start coaxing your cables into looking pretty. As you’re pinning the rest of the sweater keep looking for opportunities to arrange the cables in a pleasing manner. Give them straight lines where needed and flesh out the curves.
The rest of the blocking is a process of measuring and pinning to get the everything to match up. The back is symmetric, so anything you do on one half, you need to duplicate on the other. The next couple of pictures show a collage of the process of completing blocking the back.

This collage shows the process of pinning out the sides. I measured from the spine to the outer edge in various places and ensured that both edges matched. Since the spine is a straight line, it’s a good point of reference for measuring.

These photos show blocking the arm hole and the top of the back.

This last photo shows the back completely blocked.
After your pieces are completely blocked, allow them to dry COMPLETELY. I usually allow mine to dry at least 48 hours. I have a ceiling fan in my knitting room that can speed the process along a bit, but I still think 48 hours is safe. You want your pieces completely dry before un-pinning.
I hope this visual tour of the process was helpful to you. Please ask any questions in the comments! And look for more pictures of the other pieces blocking in the near future!
Here are some photos of the Galloway Cardigan Colorwork swatch being knitted and blocked. The post after this one will cover step-by-step measuring the swatch and calculating gauge.

This is the front side of the swatch after it has been knit. I cast on 29 stitches. That includes 3 repeats (6 x 3 = 18) plus 7 with 4 (2 + 2) edge stitches. The speed swatch instructions say to knit the first two stitches and the last two stitches using the two colors doubled up.
I knit the first stitch with the two strands that I brought across the back from the previous row. I knit the second stitch with the two colors that I will be working for the new row. I knit the last two stitch in the two colors that end that row.
For this swatch I worked rows 36 through 63. I'm not sure if I got the colors right because the pattern has the chart in shades of gray. I decided to make a new chart using Excel and my real colors so that I won't get confused as I knit.


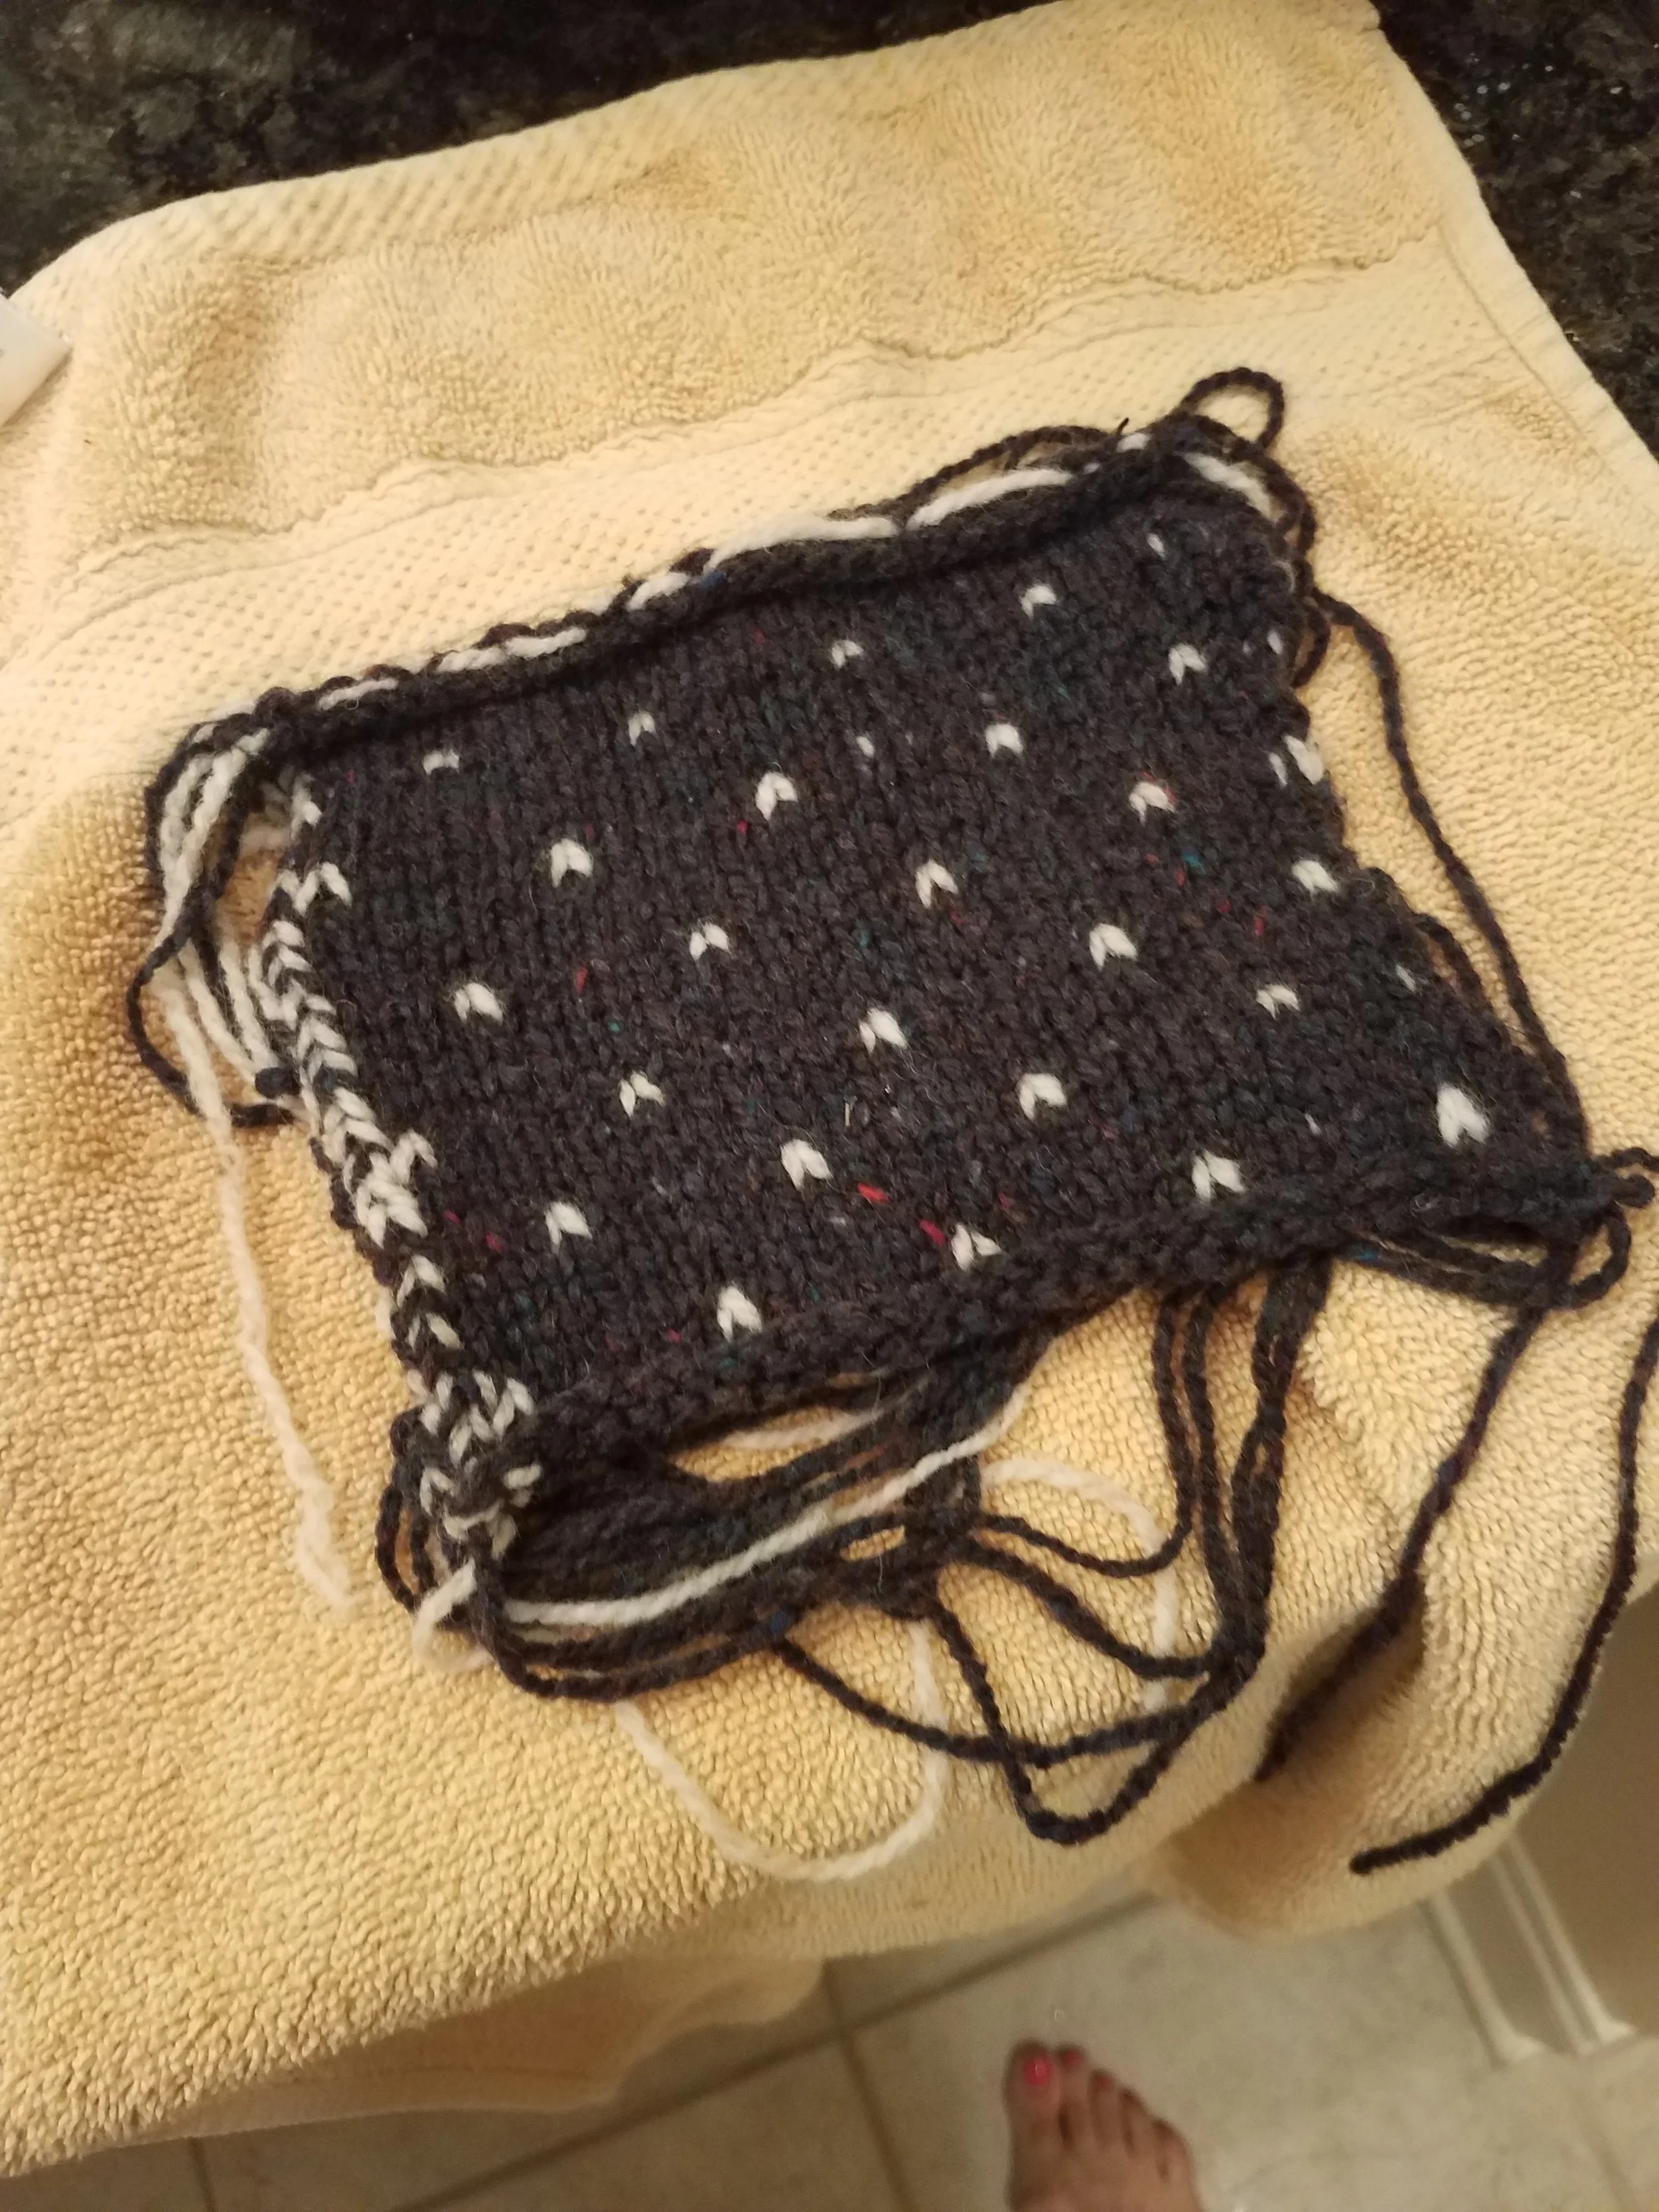
This is the back of the colorwork swatch after knitting.
Following is the colorwork swatch pinned out for blocking and drying.

Today I started on the Galloway Cardigan by Jared Flood. This is a lovely and complex pattern that requires THREE gauge swatches to determine needle size. The first swatch is done in the Lice section of the Galloway chart and should be 20 stitches & 28 rounds = 4". The recommended needle size is US 7 (4.5mm).
The pattern repeat is 6 stitches +7. I wanted to do a swatch bigger than 20 stitches, so I calculated 18 stitches + 7 stitches for the repeat, plus the 4 extra stitches (2 on each side) that Jared instructs in the Speed Swatching section of the pattern.
I cast on 29 stitches using a US 7 needle, and followed the Speed Swatching instructions. I left VERY LONG floats in the back of the swatch, because I want to have the ability to reuse the yarn if I run short. Jared's instructions talk about cutting the yarn in back before blocking, but I know that if I cut the yarn, it will no longer be useable.

I used Old World (dark blue - Color A) and Fossil (natural- Color B) colorways. I only carried the Fossil in the back of the rows where the lice occur. When not in use, I carried the Fossil with the Old World up the right hand side and used them together to knit the first two stitches of each row.

Here's the front and the back of the swatch as it gets further along. There is a 5-stitch float between each Lice stitch. I've been catching it behind the third stitch. I'm a little bothered that I can see the capture peeking through the front of the fabric. I'll see what it looks like after I block to decide if I just want to let the float go all five stitches.


I knit 35 rows (3 and a half vertical repeats) and bound off. This is what the finished front and back look like:


I put the swatch in my bathroom sink with cold water and a capful of Eucalan. I let the swatch sit for about 15 minutes, then carefully lifted it out and gently squeezed out the excess water.


I put the swatch on a towel, rolled it up and squeezed out as much water as I could.

I pinned the top, then the bottom, then the sides of the swatch to the blocking board in 1-inch intervals


I folded the floats under the swatch as I was pinning. I'll let the swatch dry for about 36 hours. Then I'll unpin it and measure the gauge. That will be covered in a future post.
The swatch used 13 grams of Old World and 3 grams of Fossil.
Let me know if this helps or if you have any questions in the comments.
Yesterday I finished up the Sammal Cardigan by Joji Locatelli, and since it was knit from the top down, it was so easy to just weave in a few ends and be finished. I sewed on the buttons when I finished the front because I was so eager to see how they would look.
Here are some photos and a description of the process I followed to block the sweater. When I refer to "left" and "right," it is as you would be standing in front of someone wearing the garment
Before blocking, I submerged the sweater in the bathroom sink with cold water and Eucalan. I let it soak for about 1/2 an hour. I gently lifted the sweater out of the sink and carefully and gently squeezed out the water. I moved the sweater to a bath towel on the floor, rolled it up and squeezed out the water. I got another bath towel and did that again.
Then I moved the sweater to another room with a plan to block on the carpet. (My lovely husband vacuumed it for me especially.) I had two transparent rulers, my pattern showing the schematic, and stainless steel blocking pins on hand.

The following photo shows me lining up the bottom of the sweater against the ruler. My garment is supposed to be 40 inches circumference. Folded in half is 20 inches. I knew that I wanted the ribbing on each side to draw in an inch, so I measured the bottom of the ribbing at 18 inches and the body at 20 inches. The red pin sits at the bottom middle of the sweater.

Next I pinned the right side of the sweater in a straight line up to the arm pit.

Then I measured 8 inches from the right edge of the sweater to the right edge of the cable. I pinned up the cable until I was parallel to the arm pit.

Next I pinned the button band up to the arm pit in a straight line and across from the right cable pins.

Then I measured 8 inches from the left edge of the left cable band and pinned the left side of the garment up to the arm pit.

I spread out the sleeves and measured the neck band at about 7 1/2 inches, then pinned the neck band.

I pinned the sleeves from the neck to the cuff. I only pinned the top of the sleeves. The sleeves were laying nicely and I didn't see a need to pin them down.

This is how it looks all pinned out. I'll let it dry for a couple of days with the ceiling fan on.

I hope this information helped you out. Let me know in the comments!